Monday, December 28, 2009
How to choose new router?
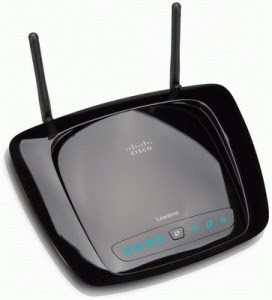
A modern wireless router specifications for present is 802.11n, 4 Ethernet ports, Hi-speed Boardband WAN port. It cost around 50$. Even low cost router supports 802.11n, although they don't have as many features and doesn't have a built-in modem, so you'll have to use it with a modem that has an Ethernet port. Also available at this price are 150 Mb per sec routers. These have fewer antennas, but are often as fast as 802.11n devices. You can expect a transfer speed of around 30 Mb per sec at 10m from any modern 802.11n router.
If you have ADSL, you should get a wireless router with a built in modem. It will cost more than the equivalent cable router, but it lets you connect your router directly to your broadband connection without a separate modem. ADSL 2 plus modems support broadband connections up to 24 Mb per sec with an ISP.
Many routers have built in USB ports that allow you to connect a USB drive and use the router as a basic network storage device. If you want to share a USB printer on your network, look for a wireless router with a built in print server. Alternatively, you can add a dedicated wireless print server later. Finally, if you're interested in making voice calls over the internet, look for a router with built in Voice Over IP support as this can save you money.
Most 802.11n wireless routers use the 2.4GHz frequency. This has good range but can be prone to interference if it's near a lot of other 2.4GHz devices, such as other routers and baby monitors. If you have trouble getting a consistent wireless signal or you want faster transfer speeds for wireless video streaming, it's worth buying a dual-band router, which can use both the 2.4GHz and 5GHz bands. Alternatively, a hi-gain antenna can boost signals and improve ranges and throughputs to the whole house. You can also add a hi-gain antenna to a PC's network adaptor. If wired network speeds are a priority, look for a router with Gigabit Ethernet.
Thursday, December 24, 2009
Single or Dual Band Wireless Router - Which is better?
Almost every broadband router destined for the home these days has Wireless LAN (WiFi). It's been ages since we reviewed a router that didn't include wireless communication for home wireless networking. That means you've got many feature when you have to selecte the suitable router for home or work place.
One way not to choose is to go by the speeds. Some vendors use the 300 Mega Bits speed that's not really speed. Your best bet is to avoid any pitch that tells you about the speed of the router. Instead, you should look at many features that you might need and that might be buried deep down in the feature chart. Fortunately, the market is flooded with WiFi routers, so finding a good one could be simpler than you might think, if you know what you're looking for. I've put together a list of the ten key points you should consider when choosing a WiFi router:
The 802.11g WiFi router, which uses a technology that has been around for 7 years!, is still popular. (802.11 is the IEEE's technical name for wireless networks; the brand name used for products is WiFi which encompasses many different types of 802.11 technology.) Small businesses buy G routers because they are cheaper and perform adequately. Some 802.11g routers include specialized functions that are essential in business, such as powerful policy-based firewalls and threat-management features. In the home, however, speed is far more important, and there the 802.11n WiFi router is king. Some N routers, such as the TrendNet Gigabit, can deliver upwards of 200 Mbps, and can theoretically reach 300 Mbps. 802.11n routers often deliver as much as five times as much throughput as G routers in real-world testing.
802.11n, by the way, was only recently ratified by the propeller-heads of the IEEE. So look on the box for the seal of certification from the WiFi Alliance. Soon, instead of "draft-N" Certified it should indicate full 802.11n Certified for the faster products.
802.11n routers come in two single band vs. dual band. Single band routers use the 2.4 GHz band, the same frequency used by G routers. Dual band N routers support 2.4 GHz and 5 GHz bands. Even at 2.4 GHz, 802.11n routers are faster than G routers because they make better use of the frequency range in the band, and they're better at bouncing signals off surrounding surfaces such as furniture and walls. Average throughput for single band N routers is usually five times as fast as G routers. And switching a dual band N router from 2.4 GHz to 5 GHz is like trading a Toyota for a Maserati. Some routers can achieve as much as 100 Mbps more by switching up. The answer is, therefore, an overwhelming yes: Dual band band routers, though generally more expensive, outperform single band routers.
Simultaneous dual-band routers are also more efficient in their throughput. Some, such as the D-Link router, can even manage the bands without any input from users. Simultaneous dual-band can help stabilize the overall throughput on your network. These routers are generally more expensive than regular dual-band routers, but are worth the extra few bucks if you've got the cash to spend.
Saturday, December 5, 2009
How To Set Up a Network Router in 13 steps
This guide explains how to set up a (wireless or not) router for home computer networks. This general procedure will guide you through the process for the common kinds of home network equipment.
1. Choose a suitable location to begin installing your router such as an open floor space or table. You may need to adjust position after installing it as the signals may not reach all areas needed.
Tips: Choose a location where the easiest to work with the router before and worry about the best placement later.
2. Plug in the router to power source, then turn on the router.
3. Connect a computer to the router. Using a cable during router installation ensures the maximum reliability of the equipment. Even if the router is a wireless model, connect this first computer to the router via a network cable. Once a wireless router installation is complete, the computer can be changed over wireless connection.
4. Open the router's administration tool. From the computer connected to the router, first open your Web browser. Then enter the router's address for network administration in the Web address field and hit return to reach the router's home page.
5. Most routers are reached by either the Web - http://192.168.1.1 or http://192.168.0.1. If not work, check on router's documentation to determine the exact address.
Tip: that you do not need a working Internet connection for this step.
6. Log in to the router. The router's home page will ask you for a username and password. Both are provided in the router's documentation. You should change the router's password for security reasons, but do this after the installation is complete to avoid unnecessary complications during the basic setup.
7. If you want your router to connect to the Internet, you must enter Internet connection information into that section of the router's configuration (exact location varies). If using DSL Internet, you may need to enter the PPPoE username and password. Likewise, if you have been issued a static IP address by your provider (you would need to have requested it), the static IP fields (including network mask and gateway) given to you by the provider must also must be set in the router.
8. If you were using a primary computer or an older network router to connect to the Internet, your provider may require you to update the MAC address of the router with the MAC address of the device you were using previously. Read How to Change a MAC Address for a detailed description of this process.
9. If this is a wireless router, change the network name (often called SSID). While the router comes to you with a network name set at the factory, you will never want to use this name on your network. Read How to Change the Router SSID for detailed instructions.
10. Verify the network connection is working between your one computer and the router. To do this, you must confirmed that the computer has received IP address information from the router. See How to Find IP Addresses for a description of this process.
11. Verify your one computer can connect to the Internet properly. Open your Web browser and visit a few Internet sites such as
12. Connect additional computers to the router as needed. If connecting wirelessly, ensure the network name (SSID) of each is computer matches that of the router.
13. Configure network security features for guarding your systems against Internet attackers.
Subscribe to:
Posts (Atom)